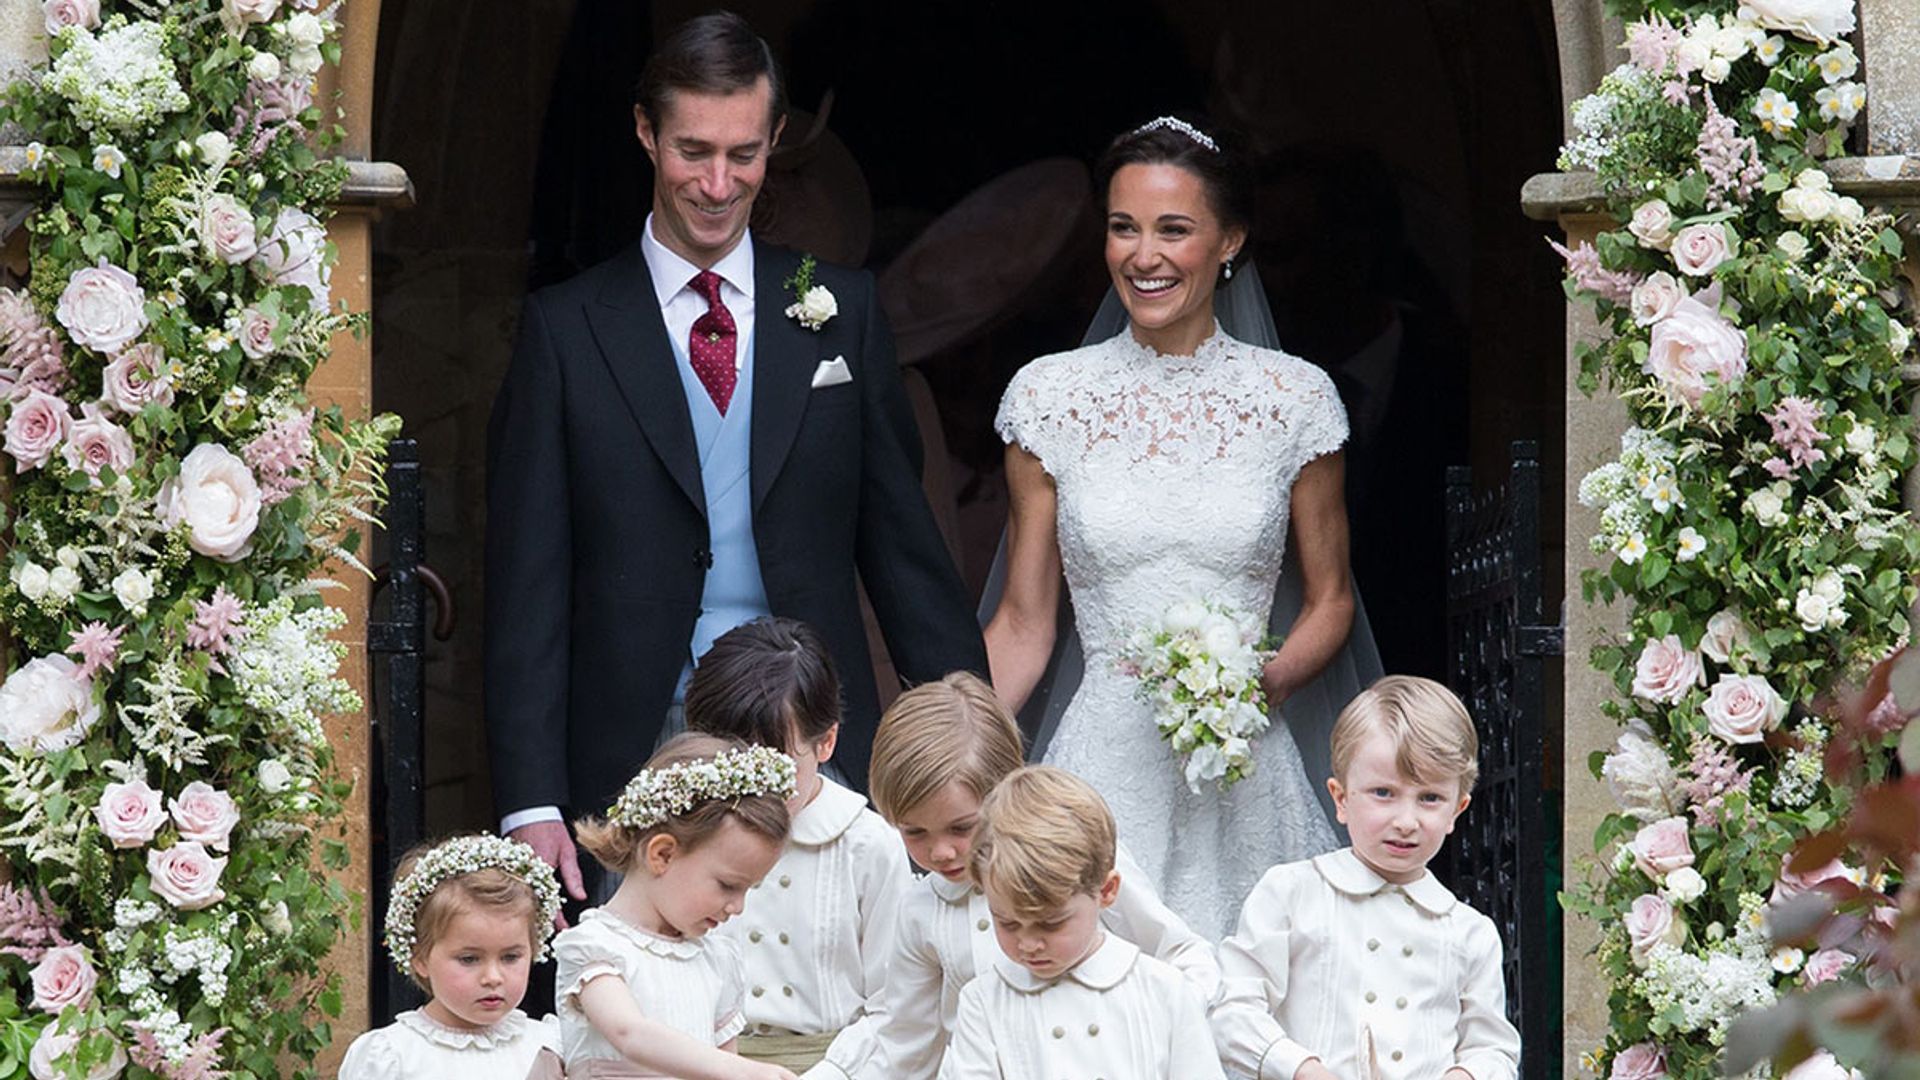

As well as organising beautiful bouquets and floral displays, many celebrity and royal brides including Pippa Middleton, Michelle Keegan, and Princess Beatrice have also chosen to have stunning flower arches at their nuptials.
READ: 5 most popular royal wedding flowers – including Princess Diana's
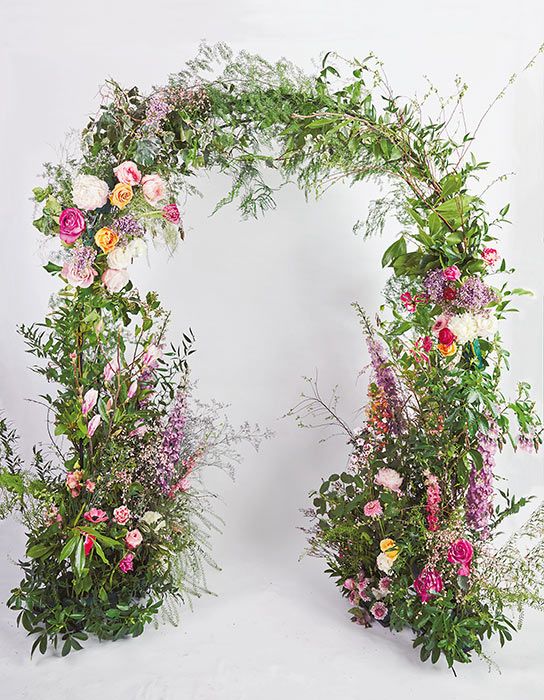
Whether you decorate the entrance to your wedding venue or use it as a backdrop to your ceremony, a flower archway doesn't need to cost hundreds of pounds.
If you’re looking to cut costs or add personality to your wedding with some DIY touches, florist Rowan Blossom has shared her step-by-step tips to make your very own flower archway from her book, Living with Flowers: Blooms & Bouquets for the Home. Keep reading for your need-to-know tutorial…
What you’ll need:
- Free-standing arch frame – find these at the garden centre or online
- 2 buckets filled with stone, pebbles, or anything that will add weight (optional)
- Floral foam garland and blocks in trays. The garland comes in a length of 12 pre-cut cylinders, which I snip into sections. All will need pre-soaking.
- Cable ties
- Florist test tubes in varying sizes (optional)
- Moss (optional)
Photo: James Stopforth
Foliage and flowers:
Find some very large foliage branches for this installation, as these very quickly build up the foam and coverage of the arch. They should be combined with shorter foliage to fill in any gaps, plus trailing pieces to wind around the arch and make it feel more natural.
MORE: What does your wedding bouquet say about you?
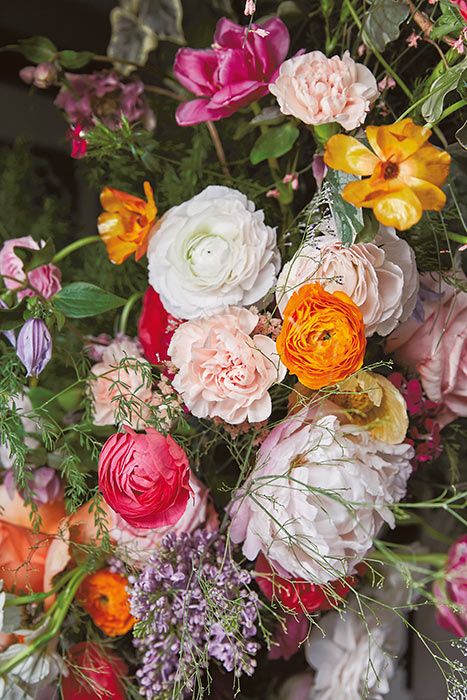
Foliage – Asparagus fern, Catkins, Cocculus, Foxtail fern, Laurel, Magnolia, Quince blossom, Soft Ruscus, Spirea, Thlaspi, Trailing Ivy.
Flowers – Anenome, Butterfly Ranunculus, ‘Combo’ rose, Daffodil, Delphinium, ‘Duchesse de Nemours’ peony, ‘Gardenia’ peony, Genista, ‘Gloriosa’ lily, ‘Golden Mustard’ rose, ‘Harlequin’ rose, Larkspur, Lilac, Lisianthus, Phlox, ‘Raspberry Scoop’ scabious, ‘Rosalind’ rose (David Austin), Sea Lavender, ‘Secret Garden’ rose, Snapdragon, Waxflower, ‘Yves Piaget’ rose.
Photo: James Stopforth

How to make your floral arch
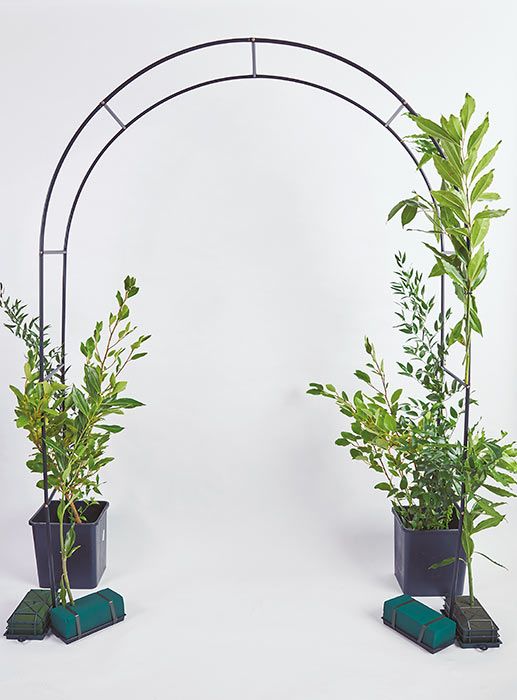
1. Decide where your arch is going to be positioned and assemble the frame in situ. If necessary, stabilise it by placing the back two spokes in buckets filled with pebbles and stones (or anything that will add weight).
If you are assembling the archway outdoors you may be able to spear the framework directly into the ground. Position two floral foam blocks on either side of the base, angling the central ones in slightly.
Photo: James Stopforth
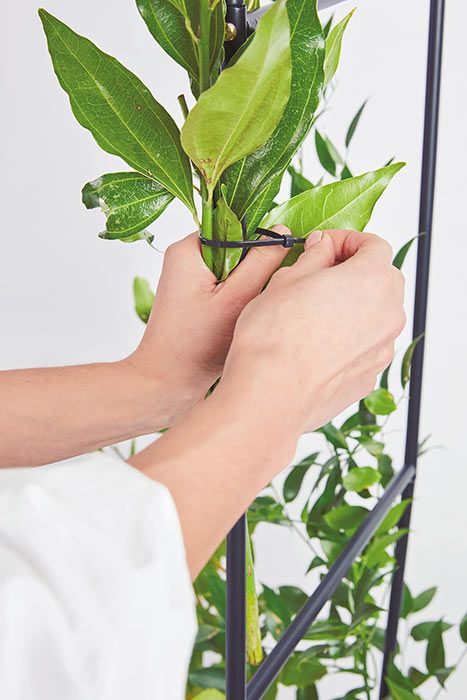
2. Select large, leafy, heavy foliage branches. These will act as the foundation of your archway, and will help to cover the frame. Cable-tie them directly to the framework, using one tie at the base of the branch and a couple more further up the branch to prevent it from slipping. Here I have used hardy foliage, so am not worried about them being without water, but if you are using foliage that is prone to drooping (such as hawthorn, whiteleaf or birch), stick the end of the branch into a large water-filled florist test tube.
MORE: 22 of the most stunning royal wedding bouquets
Photo: James Stopforth
3. Work evenly around the arch, ensuring that there is enough weight towards the back, for extra stability. Avoid attaching anything too heavy or bulky to the top of the frame. At this point you can begin to add foliage to the floral foam blocks at the base of the frame; select your tallest foliage for this, or anything that might wilt without water, and position it pointing upwards as though growing up and around the frame.
Photo: James Stopforth
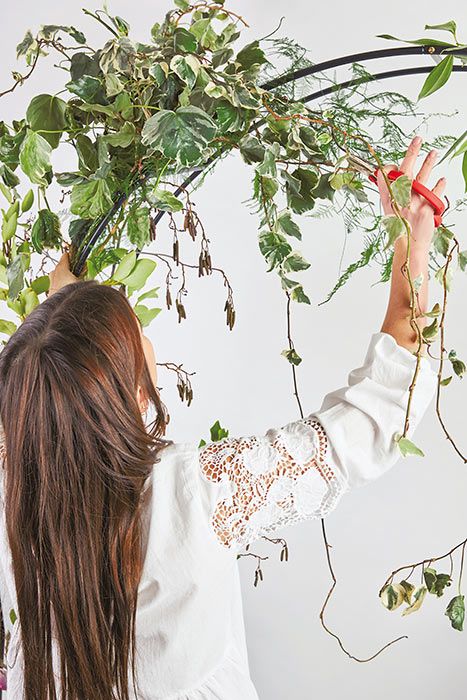
4. Secure trailing pieces of foliage at the top of the archway to unite the sides. I have used trailing ivy and feathery ferns for this, twisting them around the frame and securing with small cable ties where necessary. Keep this light, both from an aesthetic and a practical point of view, since anything heavy could compromise the archway’s stability.
STORY: Pippa Middleton's florist shares your ultimate guide to choosing your wedding flowers
Photo: James Stopforth
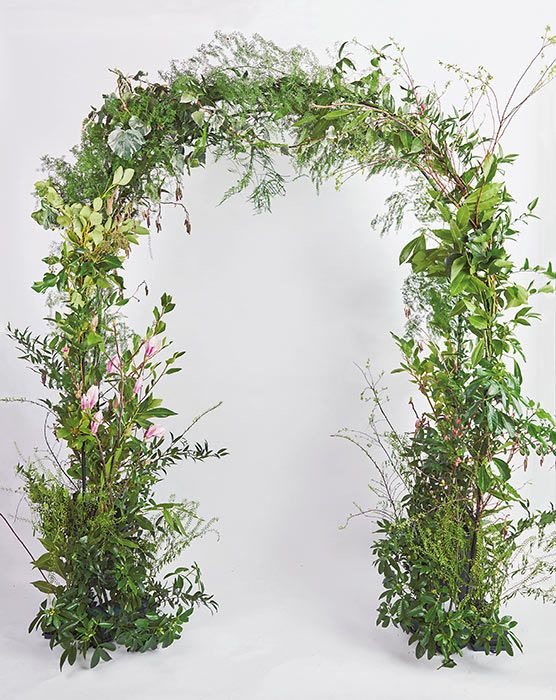
5. Keep building up the foliage until you have good, even coverage and have hidden most of the frame. The foliage should look bushy and natural. Here I have kept it fairly uniform in terms of distribution, but have avoided it looking too symmetrical by adding a stunning branch of magnolia buds on the left-hand side, and by using lots of different types of foliage and not worrying when it looked a little wild.
Photo: James Stopforth
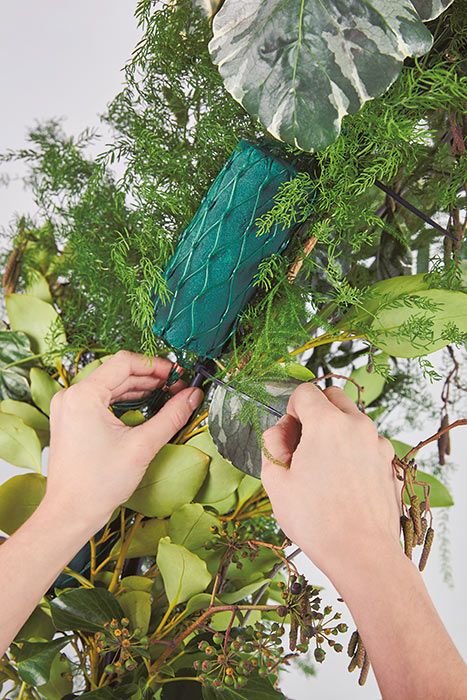
6. Step back from the archway and think strategically about where you want to position the flowers. I would always focus on the front that guests will approach first. Cut up the floral foam garland and attach individual pieces to the framework where you want the flowers to be.
Try to conceal them in the foliage. Don’t space them too evenly or symmetrically – here I added one in the top left-hand corner of the arch, and another midway down the right-hand side.
READ: Find your dream wedding décor according to your horoscope
Photo: James Stopforth
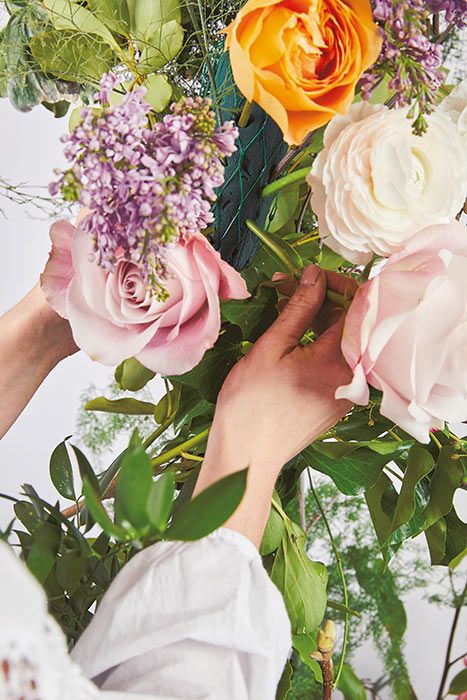
7. I always keep the florals in the upper parts of the archway quite clustered, and focus on using the round-headed babes there. Here the roses, peonies and Ranunculus are working to their maximum petal-power! I like to group the flowers together, angling the stems upwards and outwards to mimic the way they might grow in nature.
Cut the stems at a sharp angle and push them firmly into the foam, taking care that they don’t come out at the other side, as this will mean the flower cannot take on moisture. Work methodically, thinking about colour and type of flower. It is very easy to become too focused on one small area, so make sure you keep stepping back to check you are happy with the overall design.
If there are any areas of floral foam that haven’t been covered with blooms, use small pieces of foliage or moss to conceal them.
Photo: James Stopforth
8. To complete the arch, add flowers to the floral foam blocks at the base. I always reserve the tallest spires for this task, and here I have used pretty mauve delphinium and larkspur to add height and drama, connecting the base with the flowers higher up the archway.
When all the tallest flowers are in, work in some shorter ones in clusters around the base, emulating a garden border and adding intrigue and colour to the design. As before, cover any visible floral foam with small pieces of foliage or moss.
Living with Flowers: Blooms & Bouquets for the Home by Rowan Blossom was published by Laurence King on 1 April 2019. Available at www.laurenceking.com and at all good bookshops, RRP £19.99. #LivingWithFlowersBook
Photo: James Stopforth


