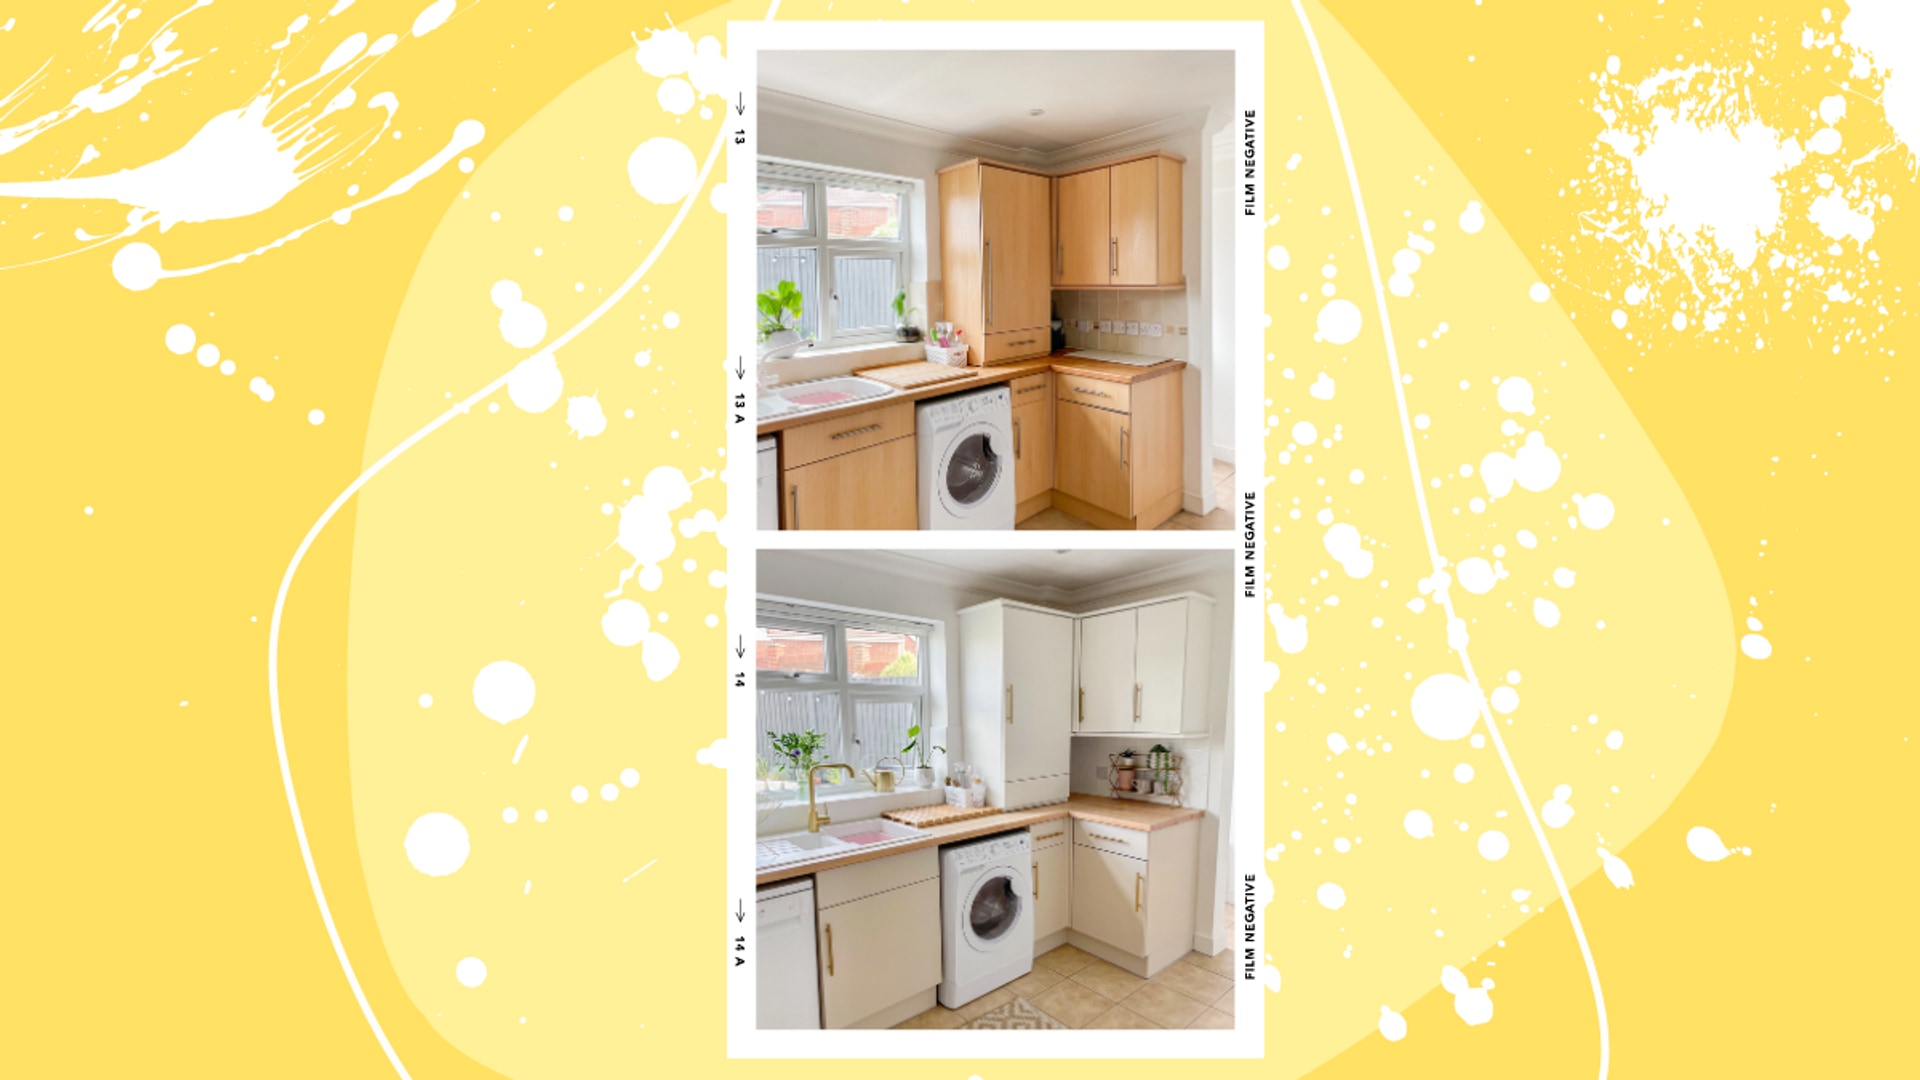
Are you renting your property but looking to give it a glow up? You may be searching for rental-friendly DIY ideas to help you transform your space, and you're in luck as we've discovered this incredible rental kitchen makeover.
Deborah Stubbington is an Instagrammer (@bangonstyle) and DIY guru who specialises in renter-friendly projects and here is her £400 kitchen. The before and afters are amazing…
Disclaimer – check with your landlord before making any changes, Deborah had the full permission of her landlord and even agreed a shared cost as the project would add value to the property.
How did you makeover your rented kitchen?
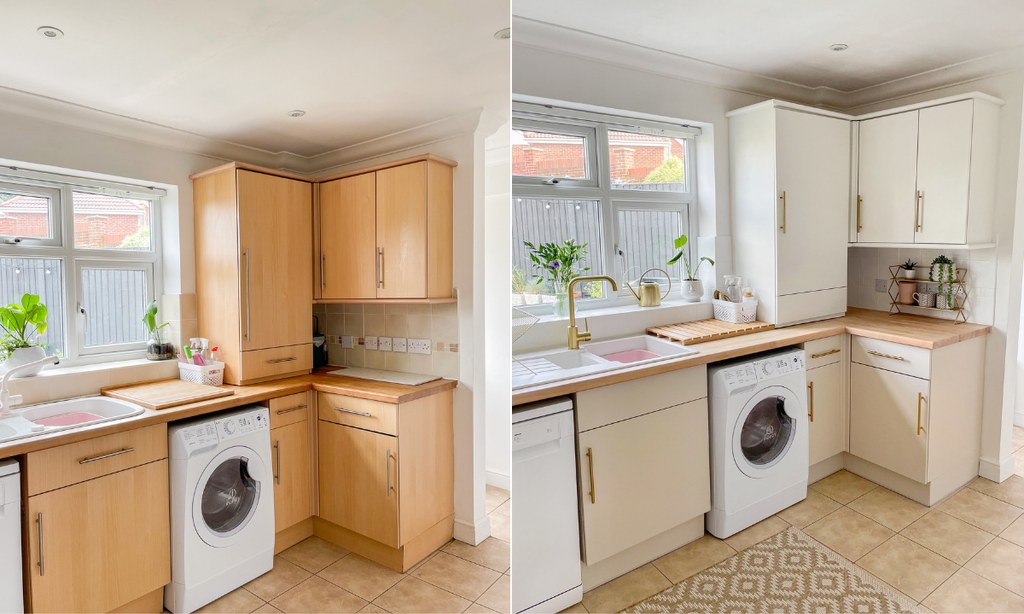
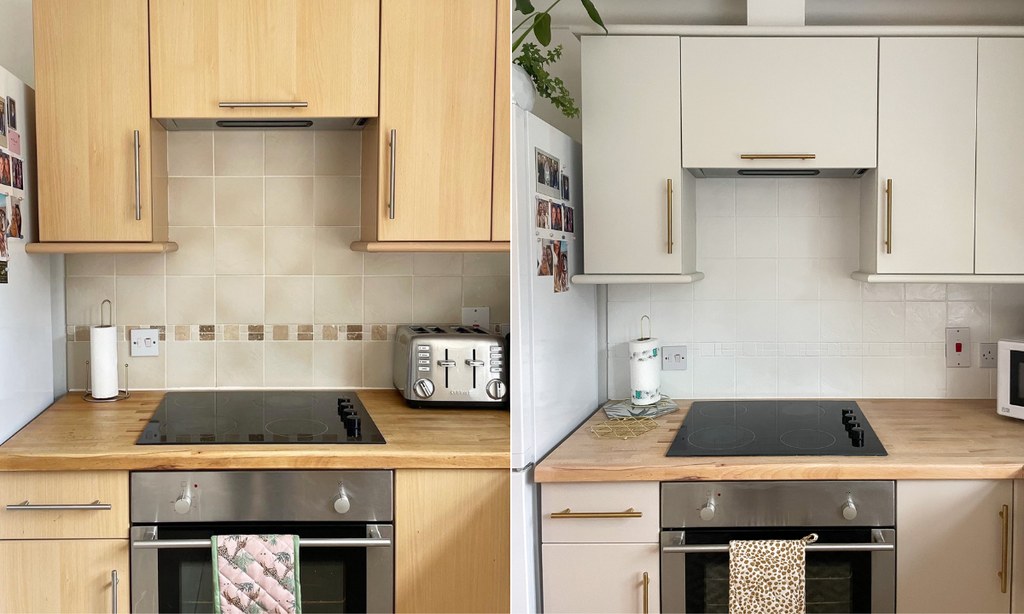
I went for a full makeover using predominantly paint. I thoroughly cleaned and sanded my kitchen tiles and painted them with an all-surface satin white paint, this took two coats and made them look much fresher and more modern and no need to repaint grout.
For my cupboards, I removed all the doors, thoroughly degreased them and sanded them fully and the outside of the carcasses too. I painted both doors and carcasses with Rustoleum Kitchen Cabinet paint, an off-white shade on the top cabinets and a soft beige on the lower cabinets. I did three coats of paint on everything and changed the silver bar handles to brushed gold ones instead.

The old sink and tap were also replaced for a nice new white composite sink with gold tap to match the handles. Finally, I sanded back all the real wood worktops and reoiled them with an oil that would keep the wood natural and not too yellowy.
Did you encounter any issues when DIY-ing your kitchen?
I'm a real perfectionist and as the kitchen is rented I wanted to do a really good job so I did take the time to do extra things like pull out all the old sealant before painting my tiles and reseal after with fresh sealant to really make the finish perfect. These kinds of things add to the amount of work and the time it took but I think make the standard of finish even better. I did experiment a lot with how to get the best finish on the kitchen cabinets, I found I didn't like a brush finish. In the end I settled on a fine mohair roller which worked perfectly.
MORE: How to transform your entire bathroom for £23 with an easy DIY hack
How long did your kitchen makeover take?
It took me nearly three weeks from start to finish but this was mainly as I only had a certain amount of space to clear out the kitchen and lay out all the doors so I painted half the kitchen at a time. Plus, I had to work around the plumber's schedule to fit the new sink as I wanted to sand the worktops once the old sink was out.
What's your biggest top tip for people just getting into DIY?
Just start! I've learnt so much along the way and even when things go wrong it always teaches you something to remember for next time and you build up skills from doing, I think. Start with something small to build confidence and remember there’s a bunch of educational and how to videos on channels like mine and others and over on YouTube too which can help you out along the way.
MORE: TikTok has gone IKEA hack mad – and this bedside cabinet makeover has 28k likes

If people have a minimal budget but want to switch up their kitchen, what one change would you suggest?
Even the change of handle can make a huge difference. Switching from a simple knob to a metal bar handle can elevate a kitchen so much and often handles can be switched using the previous holes so no drilling needed.